Suhr style “blower switch” pickup modification
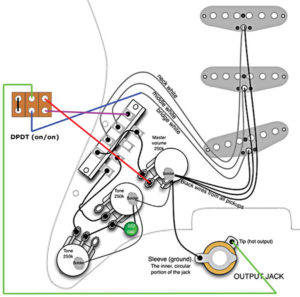
A while back I stumbled upon a really cool pickup switching idea while reading various Internet guitar forums. People were talking about the Suhr Guthrie Govan signature guitar and a really cool feature that it had. Suhr called it the “blower switch”, and it’s a switching system that allows you to switch between any pickup and volume/tone setting straight to the bridge pickup, bypassing all controls. This gives you a direct full volume bridge pickup tone without all the other wiring cluttering up the signal.
This switching setup really appealed to me so I searched around, and found this Premier Guitar article. Fender have introduced a switching system called the “Passing Lane” switch, which is essentially the same thing.
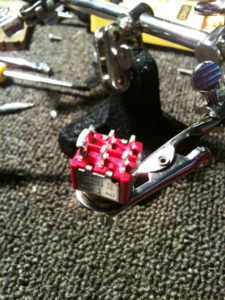
The “blower switch” is a nice simple modification that anyone who has wielded a soldering iron can do. All you need is your soldering iron and solder, some de-soldering braid, some sort of DPDT “on-on” switch, and some extra wire.
Any DPDT “on-on” switch will do. If you don’t want to have to drill any new holes in your guitar or pickguard you can pick up a “push-pull” or “push-push” DPDT pot that matches the value of your volume or tone pot.
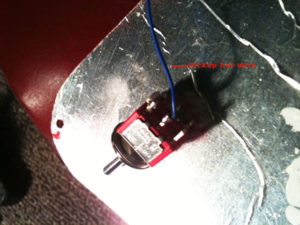
I used a small DPDT toggle switch, and installed it where my tone pot used to be. I accidentally picked up an “on-off-on” DPDT switch. It still works, but it means that there is a middle position that cuts out everything. It’s not really an issue though, as its easy to throw the switch from position 1 to 3 quickly.
I installed the “blower switch” into my Saga PRS/LP style guitar, which has two humbuckers, and a three-way switch.
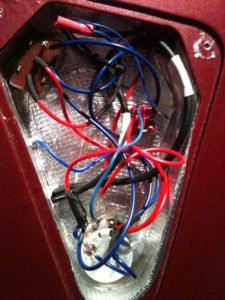
I hope the photos are somewhat useful to people who may want to try this modification.
Step 1:
Get your DPDT switch and attach a short wire between the two left hand side lugs. This is the blower switch wire, which bypasses the volume/tone controls and pickup selector.
Step 2:
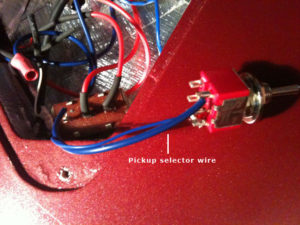
Desolder the ‘hot’ bridge pickup wire from the pickup selector, and connect it to the middle lug on the lower side of the DPDT switch.
Step 3:
Connect a new wire between the pickup selector where the bridge pickup was originally connected. Solder the other end of the wire to the right hand side lower lug of the DPDT switch, next to the pickup’s ‘hot’ wire.
Step 4:
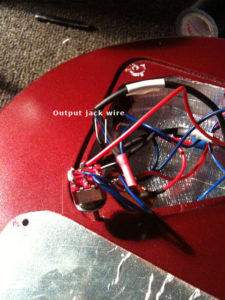
Disconnect the output jack’s ‘hot’ wire from the middle lug of your volume pot. Connect it to the upper middle lug of the DPDT switch.
Step 5:
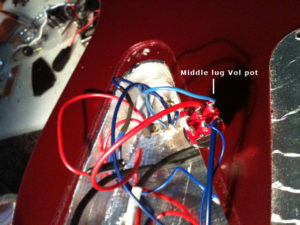
Connect a new wire between the middle on the volume pot to the upper right lug on the DPDT switch. This completes the blower switch circuit.
Step 6:
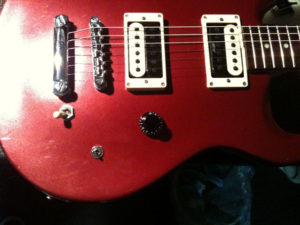
Install the DPDT switch to a hole in your guitar or pickguard. I used the hole where my tone knob used to reside.
And here it is all completed, ready to rock!
I’m really loving this mod as I can set my guitar up for a clean tone on my neck pickup, with the volume knob rolled right back. With the “blower switch” mod I can essentially emulate channel switching from a clean channel to a full-blown dirty channel just by flicking a switch on my guitar.
I see this as especially useful for people who have a single channel high gain amp, as they don’t have to worry about whether they’ve rolled their volume knob back enough, or switched to the correct pickup while playing live.
Bypassing all of the control circuitry in your guitar also means that you have a cleaner signal, and your bridge humbucker should sound even more powerful than it normally does.
After completing this modification I am thinking about installing it on all of my guitars now as I think it is extremely useful. I’m sure you’ll all find it useful too.

Leave a Reply to lonephantom Cancel reply